Showing posts with label organisation. Show all posts

Wednesday, August 26, 2015

12 Ways to Stamp with Story Stamps

I have been subscribed to Ali Edwards Story Stamps since she launched last year in September.  You can see layouts and what I have done with them here.

With so much great information in the classes that go with the subscription I have picked up lots of different ways of using my stamps.  As I looked back over my current month of layouts I thought it would be fun to put together a post about the different ways I have been using them to refer to in the future and to share.
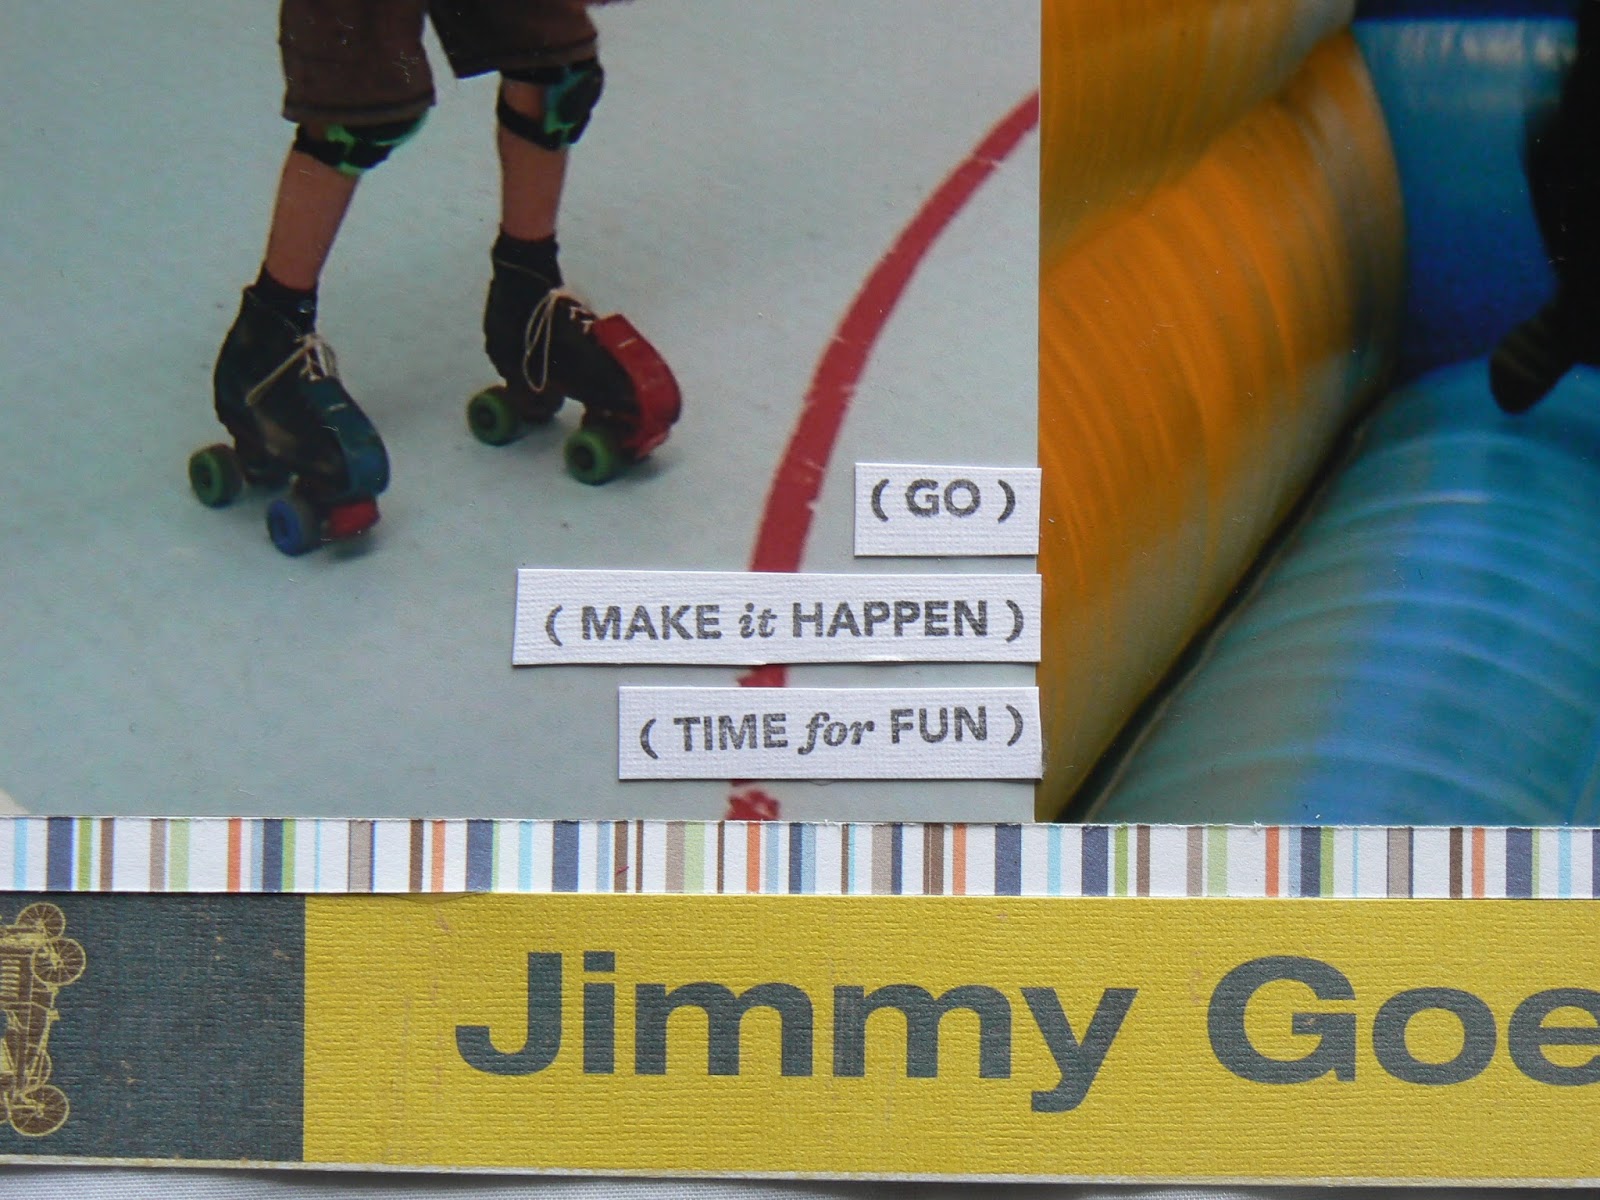
1.  SENTIMENT STRIPS
Most months there are a variety of sizes in the text.  I often pair up ones that fit and stamp on to thin strips

2.  RANDOM REPEATED STAMPING
A current favourite of Ali's is repeated stamping.  Here I used it randomly as part of my title.  Or it can be done as a patterned paper.

3.  GROUPED WORDS AND PHRASES
This repeated stamping was pairing up words that fit with my page and repeating them in a group.

4.  EMBELLISHMENTS
Many of the stamps can be used to create embellishments.  Ali uses circles in lots of different ways to add a little extra to the page

5.  BACKGROUNDS
Here I used several different stamps to create a background for the page.  This was lifted from a layout that Ali did for the little moments class where she had used a patterned paper that was printed like this.  I used a pen to hand draw the lines.

6. FUSSY CUTTING
Stamping the larger words and cutting them out to use as titles or embellishments creates another look.
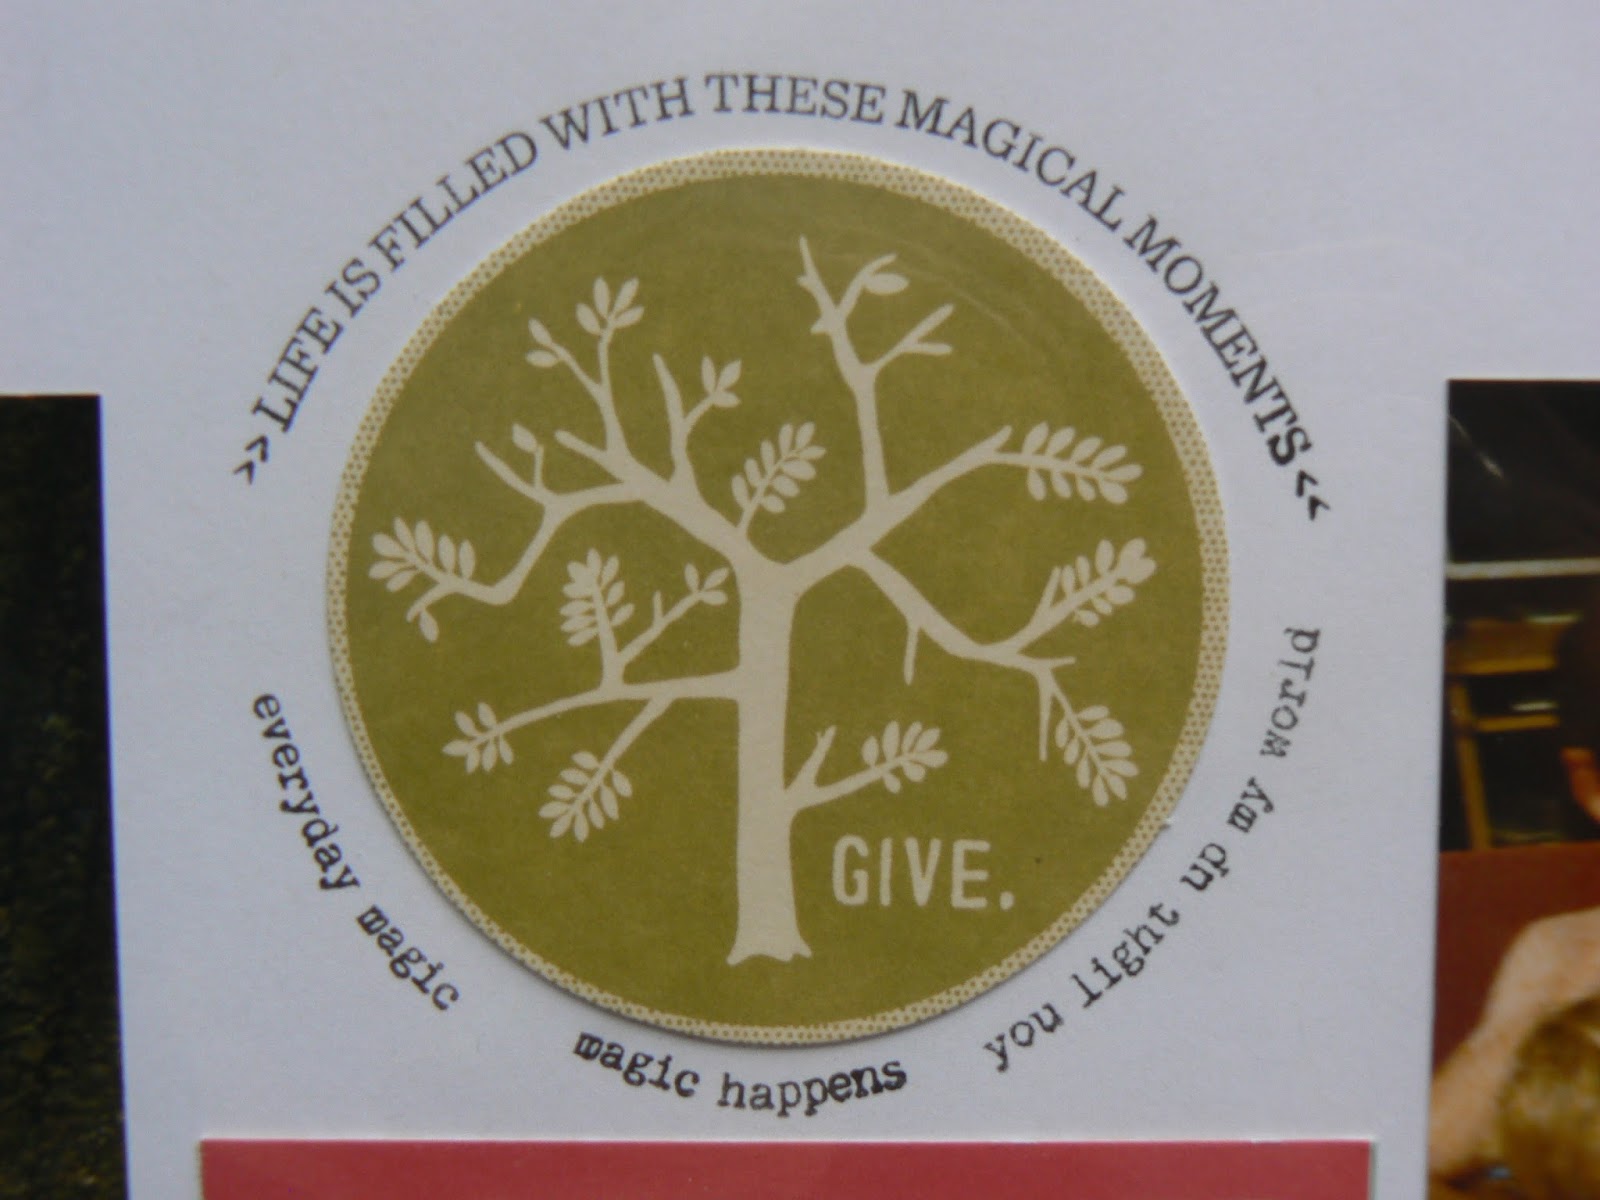
7.  CIRCULAR
The beauty of clear stamps is they bend.  Here I stamped around a circle element that I wanted to use.

8.  FRAMES
A simple hand drawn frame can be used to ground a layout. 
 I added in phrases from the stamp set to break it up.

9.  TAGS
Another way to use repeated stamping is on tags where one or two phrases are lined up and repeated over the background.  Here I have used a lighter colour and stamped a title over the top.  Sometimes I will highlight one of the phrases in the background with a darker colour.  This also works well with 3 x 4 cards for project life


10.  JOURNAL PROMPTS
Certain words can be used as launching points for journaling, as a title

or here I used it within my story.

11.  LINE IT UP
I often run a strip across the top of my page or photos.  I use the phrase stamps to add another layer
Sometimes I use the same phrase and others I mix it up or include it as part of my title.

12.  TITLES
My go to using my stamps is often for titles.  Here I used repeated stamping where I lined up the word and stamped it off to create the graduated colours.
Here I stamped one in a brighter colour as I added the rest.
There is usually flexibility with pairing up the stamps to make titles.  
Here I also repeated the stamp in the background.

Such a great collection when you put it all together.  How do you use your stamps?  I would love to hear new ideas to add to how I use them.  Leave a comment or email {found under the welcome button at the top of the page}

Happy Stamping


Tuesday, July 28, 2015

Set up for Story Stamps

I really enjoyed the last month's story stamp layouts using a kit that I had put together so I went for it again for the next month.  I subscribe just to the stamp set but there are some great things in the kit that goes with it that can also be purchased.  So this month I went with the colours and themes from the kit to put together my own one.  I added journalling cards, stamps and dies that fit.   Always something to do while waiting for the stamps to arrive.  And usually I am still putting things together and finishing up my last month when it does.


Looking forward to telling more stories with this one.


Monday, June 15, 2015

How does she?

I get a lot of layouts done when I have the chance.  {Inter}national Scrapbooking day is the perfect chance to get something done so I go all out.  I have my photos organised in stories and lay out several at once.  Then I go through my stash and pick out what I might use for each of them, matching colours and embellishments that suit.


With the extra space to spread out in our new studio I set out my photos (I always use white cardstock for my backgrounds).  Then I add in the papers either with grid style or layered.  Then I add embellishments and journal and date.  Love seeing them all together.

Tuesday, October 14, 2014

Cards for Him

So I headed away for the weekend to our church girl's getaway weekend.  So good for the soul.  We had some time to choose something that we wanted to do and so I headed to the craft spot for some creative time.  I started out with some cards for boys as I need to add to my collection.  A little bit here and something else there and they came together.


It was all the more easy with this handy tote where I keep a few bits and pieces, including papers in colour lots.  It keeps all the little bits together and is so easy to throw into my cart when I am creating away from my space.  It also gives a challenge to use what I have.

Wednesday, October 8, 2014

Workspace Wednesday

Each Wednesday I will be posting pictures of my workspace.  Workspace Wednesday came from Marcy Penner and I love the idea of the glimpse into what is currently on my desk, and it gives me motivation to keep working in my creative space.


After a great stretch of scrapbooking the stories keep coming.  I started putting together these gems for a set of pages for the boys when they went to the rugby game.  Right now they are packed away ready to head off for a weekend away that includes a bit of crafting time.   Looking forward to it.

Use it or lose it

The last of my old kits.  This one seemed to be the hardest.  Certainly not a colour combo that I would put together.  The challenge was choosing pictures to go with it.  After finding a few I decided to do some stories that didn't have pictures.  I dug through my goodies and filled a bowl with bits and pieces to add.


 And this is what I came up with.  I had seen this layout using up alphas and decided to give it a go.


 Laying out all the pages and cutting papers and adding in embellishments worked well.


This was definitely my favourite.  Mostly because I had help choosing the different bits with my son.  He loves playing along.


 These next two are more non photo layouts.  I have done a few layouts using this idea that came from a challenge day that picked up on the idea from this website Unphotographable.  Sometimes we don't have our camera, sometimes we can't take a photo or shouldn't.  Here is a solution when you still want to tell the story.


And with just a few bits left this one was the last.  Just a touch of the original colour scheme.  


Pin It
Done

Wednesday, October 1, 2014

Workspace Wednesday

Each Wednesday I will be posting pictures of my workspace.  Workspace Wednesday came from Marcy Penner and I love the idea of the glimpse into what is currently on my desk, and it gives me motivation to keep working in my creative space.  

I used to go for long spaces between crafting and it took a long time to get back into it once I did find the time.  With all my organising of late I am finding it easier to sit and do little bits here and there.  So last week I bought some little bowls to fill with goodies.  I came across The Thrifty Scrapbooker blog through the Workspace Wednesday links and have been enjoying her process videos.  Lots of little gems to take away from it, including the way that she uses her stash.  Amazing what can be done with even the smallest scraps and a corner rounder punch.

So I went through my stash and I was amazed at how many goodies that I have that I can use for extra details when I look at them in a different way.  I have also cut dies of tags, tickets, banners and tabs to be stamped as I use them.  My bowls are now filled with goodies ready to be used.


Pin It

Seems I have a love for turquoise just like Suse!

Thursday, September 25, 2014

Workspace Wednesday

With all my scrapbooking time lately I have been completing lots of great projects that have been sitting about for way to long.  I am almost ready to embark on new projects and so I had to stock up on supplies that I can't do without.  The first is white cardstock.  I have been searching for some time to find a supply at a good price.  I prefer non textured and have been using the paper insert that comes with the page protectors that I get.  With stitching on them I need two per protector and so I end up with loads of page protectors. So I was more than a little happy to find a stash of white cardstock in the bargain bin at the stationery store.


And I have been building up my containers of goodies and am loving the way that Marcy Penner and Stephanie use bowls and baskets for their little bits and pieces.  It just makes you want to use them.  Looking forward to going for treasure hunts through my goodies to add to these bowls.


And where would I be without my trusty adhesive.  Everyone has their preferences when it comes to what they use.  I discovered these gems a while ago and they have stuck (pardon the pun).  I get them in bulk from a packaging place in town.  I used to get just one box but am finding now that I am scrapping more I go through a lot more.

Tuesday, September 23, 2014

Project of the Week

Of all my Use it or Lose it projects this one has been a favourite.  This is a favourite colour combo of mine and I still like the papers that were in the set.  But it is time for a clear out and the last of the papers would have continued to sit there if I hadn't done something with them.  When I was away on my crop weekend we all got scrapping magazines in our goody bags and some had free papers included.  The colour match was perfect.  The bonus was also using the Kaiser word stamps that I had purchased some time ago and have been keeping for another project that I have.


Pin It


Colours: baja breeze, chocolate chip, sahara sand
Stamps:  words (kaiser)
Finishing touches:  papers (kaiser and scrapping magazine), rub on, grosgrain ribbon (SU), buttons, distressing tool
Related Posts Plugin for WordPress, Blogger...